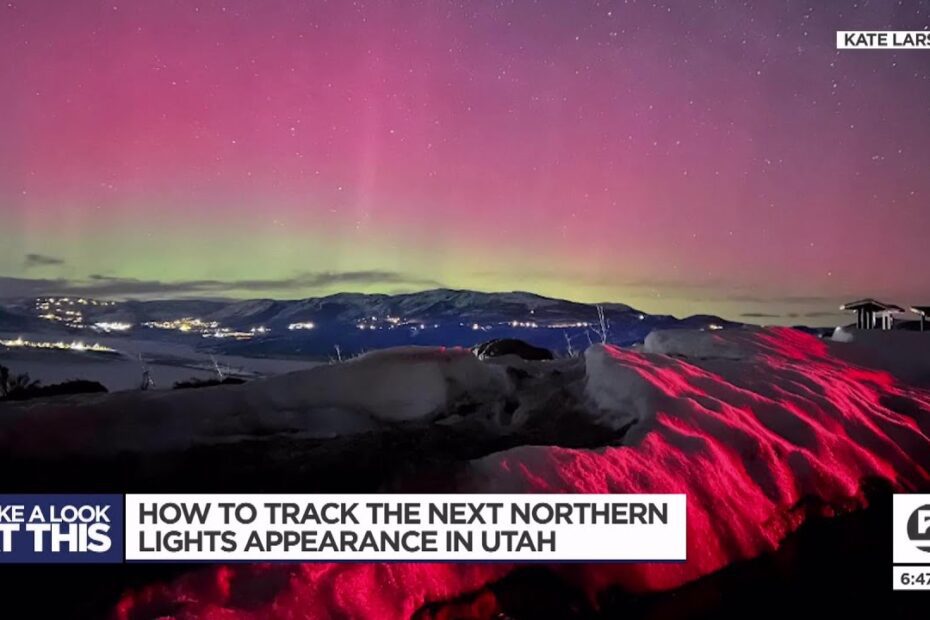
To track Northern Lights, you can use various methods including apps, websites, and live webcams. Witnessing the mesmerizing beauty of the Northern Lights is a dream for many nature enthusiasts.
Also known as the Aurora Borealis, this stunning natural phenomenon occurs in the polar regions due to the interaction of charged particles with the Earth’s magnetic field. Tracking the Northern Lights can be a thrilling adventure, especially for photographers and avid travelers.
Fortunately, there are several effective methods to track and experience this magical display of lights. From using mobile apps that provide real-time updates to exploring websites with detailed predictions, and even watching live webcams, there are plenty of options to ensure you don’t miss out on this awe-inspiring spectacle. We will explore the various methods available for tracking the Northern Lights and maximizing your chances of witnessing this breathtaking celestial show.
Essential Equipment For Northern Lights Tracking
Discover the essential equipment needed to track the enchanting Northern Lights. From warm clothing to a sturdy tripod, prepare for a remarkable experience under the mesmerizing night sky.
To capture the awe-inspiring beauty of the Northern Lights, it’s crucial to have the right equipment at your disposal. Here are the essential tools that will help you track and photograph this captivating natural phenomenon:
Camera
- A high-quality DSLR or mirrorless camera: Invest in a camera that offers manual control over settings like ISO, aperture, and shutter speed. This will allow you to adjust the camera according to the lighting conditions of the Northern Lights.
- Full-frame sensor: Consider using a camera with a full-frame sensor as it provides superior low-light performance, resulting in clearer and more detailed images.
- Raw capability: Ensure that your camera has the capability to shoot in RAW format. This is important for preserving the maximum level of detail in your images and allowing for better post-processing.
Tripod
- Sturdy tripod: A reliable tripod is essential for keeping your camera steady during long exposure shots. Choose a tripod that is stable and adjustable, allowing you to position your camera at various angles.
- Weighted hook or sandbag: Use a hook or sandbag to add extra stability to your tripod, especially in windy conditions. This will prevent any camera movement and guarantee crisp shots.
Wide-Angle Lens
- Wide-angle lens with a fast aperture: Opt for a wide-angle lens with a focal length between 14mm and 24mm. This will help capture the expansive sky and allow for more of the Northern Lights to fit within the frame. Additionally, choose a lens with a wide aperture (e.g., f/2.8 or lower) to gather as much light as possible.
Remote Shutter Release
- Wireless or wired remote shutter release: Avoid camera shake by using a remote shutter release to trigger the shutter without physically touching the camera. This is particularly useful when shooting long exposures or multiple exposures for time-lapse sequences.
Having the right equipment is essential for tracking and capturing the mesmerizing Northern Lights. Invest in a high-quality camera with manual controls, a sturdy tripod, a wide-angle lens with a fast aperture, and a remote shutter release. These tools will enhance your chances of capturing stunning images of this natural wonder.
Happy shooting!
Choosing The Best Location For Northern Lights Viewing

Choosing the ideal location to track the mesmerizing Northern Lights is an important aspect for an unforgettable experience. By considering factors such as low light pollution, clear skies, and proximity to the magnetic North Pole, you can enhance your chances of witnessing this breathtaking natural phenomenon.
Researching Prime Viewing Spots
Doing thorough research is key to finding the best locations for observing the Northern Lights. Here are some important factors to consider when selecting a location:
Factors To Consider When Selecting A Location
Latitude:
- Choose a location closer to the Arctic or Antarctic regions, as they offer the most frequent and intense Northern Lights displays.
- Ideal latitudes range between 60 and 70 degrees in the Northern Hemisphere and between 60 and 70 degrees in the Southern Hemisphere.
Light Pollution:
- Opt for areas with minimal light pollution to enhance the visibility of the auroras.
- Consider remote locations away from cities, as artificial lights can hinder the view.
Weather Conditions:
- Find places with clear skies and favorable weather conditions for optimal visibility.
- Research the average cloud cover and consider areas with low precipitation and humidity.
To track the Northern Lights successfully, make sure to consider these factors. Latitude plays a significant role in determining the frequency and intensity of the displays. Lower light pollution levels provide a clearer view of the dancing lights, while favorable weather conditions ensure unobstructed sightings.
Now, let’s dive into each factor in more detail.
Timing Your Northern Lights Chase
Timing Your Northern Lights Chase is crucial to maximize your chances of witnessing this breathtaking phenomenon. Learn how to track Northern Lights and plan your trip accordingly for an unforgettable experience.
The Northern Lights, also known as the aurora borealis, are a breathtaking natural phenomenon that can be seen in certain parts of the world. If you’re eager to witness this mesmerizing display of colors, timing is crucial. Understanding the aurora forecast, knowing the best time of year for viewing, and being aware of the optimal viewing hours are essential factors for planning your Northern Lights adventure.
Understanding The Aurora Forecast:
- Check the real-time aurora forecast to stay updated on the intensity and visibility of the Northern Lights.
- Various websites and apps provide detailed forecasts, indicating the likelihood of auroral activity.
- Pay attention to the Kp index, a scale ranging from 0 to 9 that measures the geomagnetic storm level. Higher Kp values indicate greater chances of Northern Lights activity.
Best Time Of Year For Viewing:
- The prime time to witness the Northern Lights is during the winter months, particularly from September to April.
- Locations closer to the Arctic Circle, such as Norway, Alaska, and Iceland, offer greater opportunities for viewing.
- Winter in these regions provides longer nights, which means more darkness for the aurora to shine brightly.
Optimal Viewing Hours:
- The Northern Lights typically occur between 10: 00 PM and 2:00 AM local time, but this can vary depending on your location and the time of year.
- Avoid areas with excessive light pollution, as it can hinder the visibility of the aurora.
- Stay patient and allow yourself ample time to observe the Northern Lights. Sometimes, they appear early in the night, while other times they may make a late-night appearance.
Keep in mind that the Northern Lights are a natural phenomenon, and visibility cannot be guaranteed. However, by understanding the aurora forecast, choosing the right time of year, and being aware of the optimal viewing hours, you increase your chances of having a remarkable Northern Lights experience.
So prepare your camera, wrap up warm, and get ready to witness the celestial magic of the Northern Lights!
Camera Settings For Northern Lights Photography

Capturing stunning images of the mesmerizing Northern Lights requires precise camera settings. Learn how to track these natural wonders and enhance your photography skills for capturing the breathtaking beauty of the aurora borealis.
Manual Mode:
- When photographing the Northern Lights, it is crucial to switch your camera to manual mode. This allows you to have complete control over the various settings, resulting in the best possible shots.
Aperture:
- Set your aperture to its widest possible setting, which is the lowest f-number your lens allows. This helps in capturing as much light as possible and makes the Northern Lights appear more vibrant in your photos.
Iso:
- Increase your camera’s ISO sensitivity to a higher value, around 800 to 1600. This allows your camera to be more light-sensitive, enabling you to capture the faint details of the Northern Lights without introducing too much noise into your shots.
Shutter Speed:
- Adjusting the shutter speed correctly is crucial for capturing stunning Northern Lights photos. Start with a shutter speed of around 10-20 seconds and experiment from there. Longer exposures will capture more movement and create mesmerizing light streaks, while shorter exposures can freeze the lights in the sky.
Remember, capturing the Northern Lights is all about experimentation and adjusting these settings according to the specific conditions and desired effect. Be sure to keep your camera steady using a tripod or stable surface for crisp and blur-free shots. Happy shooting!
Composition Tips For Capturing Stunning Aurora Photos
Learn how to effectively track and capture stunning photos of the Northern Lights with these composition tips. Discover expert techniques for photographing this elusive natural phenomenon and create breathtaking images of the Aurora.
Framing The Shot:
- Find a captivating landscape to serve as the backdrop for the Aurora Borealis.
- Utilize the rule of thirds to compose a visually balanced shot.
- Position the Northern Lights in one-third of the frame to create interest and depth.
- Experiment with different focal lengths to capture a wide-angle view or zoom in for a more detailed shot.
- Adjust the camera settings to achieve the desired exposure and focus.
Incorporating Foreground Elements:
- Look for interesting foreground elements such as trees, mountains, or structures.
- Use these elements to create a sense of scale and add depth to your photograph.
- Position the foreground elements strategically to lead the viewer’s eye towards the Northern Lights.
- Experiment with different angles and perspectives to find the most visually appealing composition.
- Ensure that the foreground elements complement the overall scene and do not distract from the main subject.
Experimenting With Different Angles And Perspectives:
- Change your shooting position to explore different angles and perspectives.
- Capture the Northern Lights from low angles to emphasize their grandeur against the horizon.
- Experiment with high angles to include other elements of the night sky, such as stars or the moon.
- Try shooting from different vantage points, such as higher elevations or near bodies of water, to add interest.
- Don’t be afraid to get creative and break away from traditional compositions to bring a unique perspective to your Aurora photos.
Remember, capturing stunning Aurora photos goes beyond technical settings. It’s about finding the right composition, incorporating interesting foreground elements, and experimenting with various angles and perspectives. Put these composition tips into practice, and you’ll be well on your way to capturing breathtaking images of the Northern Lights.
Happy shooting!
Techniques For Long Exposure Aurora Photography
Discover the art of long exposure photography for capturing the mesmerizing Northern Lights. Track the dancing auroras in the night sky with these expert techniques.
A magical display of lights dancing across the night sky, the northern lights, or aurora borealis, is a sight to behold. Capturing the beauty of this natural phenomenon through photography can be a rewarding experience. In order to capture stunning long exposure shots of the northern lights, there are a few techniques you can employ.
Below, we’ll explore some essential techniques for long exposure aurora photography:
Bulb Mode:
- Enable bulb mode on your camera to have complete control over the exposure time.
- This mode allows you to manually control the exposure, which is crucial for capturing the dynamic nature of the aurora borealis.
- Keep in mind that bulb mode keeps the shutter open as long as the shutter release button is pressed.
- Use a tripod to keep your camera steady during the long exposures required for capturing the northern lights.
Using A Remote Shutter Release:
- Utilize a remote shutter release to avoid any camera shake caused by pressing the shutter button manually.
- This is especially important for long exposure photography, as even the slightest movement can result in blurred images.
- A remote shutter release allows you to trigger the camera’s shutter without physically touching it, ensuring sharp and clear photos.
Calculating The Correct Exposure Time:
- Determining the correct exposure time is key to capturing the vibrant colors and intricate details of the northern lights.
- Start by setting the ISO to a value between 800 and 1600 to capture the faint light.
- Experiment with different exposure times, typically ranging from 5 to 30 seconds, depending on the intensity of the aurora and the ambient light conditions.
- Check the histogram after each shot to ensure the exposure is balanced and avoid overexposure.
Remember, capturing breathtaking long exposure shots of the northern lights requires patience, practice, and experimentation. Combine the bulb mode, remote shutter release, and correct exposure calculations to enhance your chances of capturing stunning aurora photographs in all their glory. Enjoy the experience and let your creativity guide you as you endeavor to immortalize the captivating dance of the northern lights.
Planning Your Trip To Maximize Aurora Chasing Opportunities
Learn how to maximize your chances of witnessing the mesmerizing Northern Lights by planning your trip effectively. Discover expert tips on tracking the Aurora Borealis and creating the perfect itinerary for an unforgettable experience.
If you’re planning a trip to witness the mesmerizing Northern Lights, proper planning can be the key to maximizing your chance of witnessing this natural spectacle. To ensure you make the most of your aurora chasing experience, consider the following tips:
Staying At Remote Locations
To increase your chances of spotting the enchanting Northern Lights, staying at remote locations away from light pollution is crucial. Here are some reasons why:
- Minimal Light Pollution: Remote areas offer darker skies, allowing you to fully appreciate the vibrant colors of the auroras.
- Unobstructed Views: Being situated in remote locations means fewer obstructions, providing clear sightlines for uninterrupted stargazing.
Finding Accommodation With Clear Sky Views
When choosing accommodation for your aurora chasing trip, it’s important to prioritize places that offer clear views of the night sky. Here’s why this matters:
- Ideal Photography Opportunities: With unobstructed sky views, you can capture stunning photographs of the Northern Lights.
- Faster Aurora Spotting: Choosing accommodation with clear sky views reduces the time you spend searching for the auroras, increasing your chances of spotting them.
Planning For Multiple Nights
When organizing your trip, allocating multiple nights for aurora chasing is highly recommended. This approach has its advantages:
- Increased Chances of Viewing: The Northern Lights can be unpredictable, appearing on certain nights and fading away on others. Planning for multiple nights ensures you have more opportunities to witness this awe-inspiring phenomenon.
- Weather Flexibility: Weather conditions can impact the visibility of the auroras. Allowing for multiple nights gives you the flexibility to make adjustments based on the weather forecast, increasing your chances of catching a clearer view.
Remember, meticulously planning your trip, including staying at remote locations, finding accommodation with clear sky views, and allocating multiple nights for aurora chasing, can greatly enhance your chances of witnessing the captivating Northern Lights. So start preparing now to make your aurora chasing experience an unforgettable adventure.

Credit: capturetheatlas.com
Tips For Staying Warm And Comfortable During Northern Lights Photography

With the help of these tips, you can stay warm and comfortable while tracking the awe-inspiring Northern Lights for your photography.
Northern Lights photography can be an exhilarating experience, but it’s important to stay warm and comfortable while capturing those stunning moments. Below are some useful tips to help you make the most of your photography adventure:
Dressing In Layers:
- Layering is key to staying warm during cold nights. Here’s how you can dress for success:
- Start with a moisture-wicking base layer to keep sweat away from your body.
- Add an insulating layer like a fleece or down jacket to trap your body heat.
- Top it off with a waterproof and windproof outer layer to protect yourself from the elements.
- Don’t forget about your extremities – wear thick socks, insulated gloves, and a warm hat to keep your head and hands toasty.
Using Hand Warmers:
- Hand warmers are a fantastic way to keep your hands warm and dexterous while operating your camera. Here’s why you should always have them on hand:
- Activated by air, small hand warmers generate heat for several hours, providing continuous warmth for your hands.
- They are portable and can easily fit in your pockets or camera bag.
- Invest in reusable hand warmers to save costs in the long run and be eco-friendly.
Bringing A Thermos Of Hot Drinks:
- Sipping on a warm beverage can keep your body temperature up and make your photographic adventure more enjoyable. Here’s why it’s a great idea:
- A thermos filled with hot tea, coffee, or cocoa will help warm you from the inside out.
- Choose beverages that can provide sustained warmth, such as herbal tea or hot chocolate.
- Avoid alcohol, as it can actually make you feel colder.
Remember, a comfortable and warm photographer is a focused and creative one. By dressing in layers, using hand warmers, and bringing a thermos of hot drinks, you can stay cozy while capturing the awe-inspiring beauty of the Northern Lights. So, bundle up and get ready for an unforgettable experience!
Sharing Your Northern Lights Journey
Embark on an unforgettable journey to witness the majestic Northern Lights by learning how to track them. Discover the best tips and techniques to optimize your chances of experiencing this breathtaking natural phenomenon.
Selecting The Best Photos
- Consider the focal point: Look for photos that capture the mesmerizing beauty of the Northern Lights. The aurora itself should be the main subject, with other elements complementing its brilliance.
- Pay attention to composition: Aim for balanced compositions that feature interesting foregrounds or landscapes. This will add depth and perspective to your images, making them more visually appealing.
- Play with exposure settings: Experiment with different exposure settings to capture the vivid colors and intricate details of the aurora. Bracketing your shots can help you achieve the perfect balance of light and dark.
- Use a tripod: To avoid blurry images, stabilize your camera on a sturdy tripod. This will allow for longer exposure times without any shake or movement.
- Capture different angles: Vary your shooting angles to showcase the Northern Lights from different perspectives. Get creative and look for unique vantage points that highlight the grandeur of the natural phenomenon.
Post-Processing Tips
- Adjust white balance: Fine-tune the white balance to ensure the colors in your Northern Lights photos appear true to life. Experiment with different temperature and tint settings to find the perfect balance.
- Enhance contrast and vibrancy: Increase the contrast and vibrancy of your images to make the colors pop. This can help intensify the impact of the aurora and create a more captivating visual experience.
- Reduce noise: Northern Lights photos often suffer from noise due to higher ISO settings. Use noise reduction techniques in post-processing software to achieve cleaner and sharper images.
- Sharpen selectively: Apply selective sharpening to enhance the details of the aurora without affecting other elements in the photo. This will help accentuate the intricate patterns and textures of the Northern Lights.
- Crop and straighten: Make sure to crop out any distracting elements and straighten your photos if necessary. This will give your images a polished and professional look.
Sharing Images On Social Media
- Choose the right platform: Consider the audience you want to reach and select the social media platform that aligns with your goals. Instagram is known for its visually-driven content, while Facebook offers a broader reach.
- Write compelling captions: Craft engaging captions that provide context, share your personal experience, or convey the emotions evoked by the Northern Lights. A well-written caption can enhance the impact of your images.
- Utilize relevant hashtags: Research and include relevant hashtags to increase the visibility of your Northern Lights photos. This will help attract a wider audience and increase the chances of your images being discovered.
- Engage with the community: Interact with other users by liking, commenting, and sharing their content. Building relationships within the photography and travel communities can lead to greater exposure for your own work.
- Protect your images: Consider adding a watermark or copyright information to your photos before sharing them online. This helps prevent unauthorized use and ensures proper attribution.
Remember, capturing the beauty of the Northern Lights is a unique and incredible experience. By selecting the best photos, applying post-processing techniques, and sharing your images on social media, you can inspire others to embark on their own Northern Lights journey.
Happy photographing!
Frequently Asked Questions For How To Track Northern Lights
What Is The Best Way To Track The Northern Lights?
To track the Northern Lights effectively, monitor aurora forecast websites, choose a location with clear skies, and check the weather conditions regularly.
Can Northern Lights Be Tracked?
Yes, Northern Lights can be tracked and observed in certain locations around the world.
How Do You Know Where The Northern Lights Are?
To know where the Northern Lights are, check real-time aurora forecasts or use apps and websites dedicated to tracking them.
What Is The Best App To See The Northern Lights?
The best app to see the Northern Lights is “Northern Lights Photo Taker. “
Conclusion
Witnessing the breathtaking display of the Northern Lights is an experience like no other. By following some simple steps, you can enhance your chances of tracking and capturing this natural phenomenon. Begin by choosing the right location, away from light pollution, and on clear nights.
Utilize various helpful apps and websites to stay updated on solar activity and weather conditions. Familiarize yourself with the best camera settings to capture the colors and movement effectively. Patience is key when waiting for the lights to appear, so make sure to allocate enough time for your expedition.
Embrace the adventure and immerse yourself in the joy of anticipation as you await the appearance of the Northern Lights. Remember, tracking these magical lights is a combination of science, technology, and the willingness to explore nature’s wonders. So grab your camera, pack your warmest clothes, and embark on an awe-inspiring journey to witness the Northern Lights in all their natural glory.
- What Is the 11 Hour Limit: A Comprehensive Guide - June 7, 2024
- What Happens if You Drive on a Suspended License in Virginia - June 7, 2024
- Wilcox Justice Court Overview: Online Services & Legal Proceedings - June 6, 2024